Whew! I am finally getting to writing a post just under the wire for day two on this little challenge and I'd better type fast or I'm going to miss my deadline. What a full day it has been. DH took the day off to help me set things up and between cake decorating, swimming lessons, karate lessons, cooking meals and laundry, it has been a busy, busy day. Typical but busy.
Before I had Eldest, I had an irrepressible urge to take a cake decorating course which I'm pretty sure could be blamed on me nesting during pregnancy. I took a Level 1 Wilton course at Michaels in Ottawa and all of my cake decorating results are based on that one course. Get yourself out to your nearest Michaels if you are at all interested. Great fun.
You might not have the slightest interest in cake decorating but, that's what I spent many minutes doing today so I'm going to give you a brief recitation of my process.
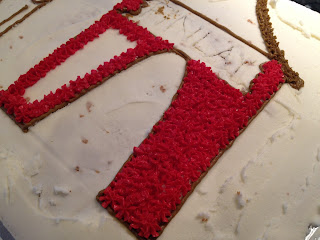
First, the 'crumb' coat. You are supposed to brush off your cake before icing it which I did but, as you can see below, my crumb coat is pretty crumby. I think I would have failed this level in class;)! However, I knew that I was going to layer lots more icing on top so a few crumbs on the first layer was not a big problem.
Step two is outlining and what I affectionately call the 'ugly' stage. I mentioned that the dog and dog house from Youngest's invitations were going to be on his cake and this is my sketch. Not perfect but not too bad.
Step three is the filling in portion (I use a 16 star tip in case you're wondering) which is my favourite step because A) the cake simply starts to look better and B) I like mixing up all the pretty colours.
A poor picture of the nearly finished product and I promise a nicer one after the party tomorrow but I love how the stars make the doggy look furry!
 |
| Finished! I promise a better picture in the morning. |
Another item on the to do list today were the loot bags. I mentioned yesterday that we use brown paper bags for our loot bags and have done so for several years. I use the theme of the year (e.g. pirates - skull and cross bones stamp) and carve a stamp to use on the loot bags to give them a bit of a personal touch. This years doggy theme seemed to scream for a paw print stamp.
If you haven't tried carving your own stamp then I highly recommend giving it a try. This is one of the most satisfying, quick and easy crafts that I do. Carving this stamp took me about 15 minutes and always results in a real sense of accomplishment.
These paws were made for walking...
Until tomorrow...


No comments:
Post a Comment